
Maintaining the boat is an essential thing to do. Without proper maintenance, you might end up paying extra money for tiny repairs. You can avoid paying that extra money by doing simple boat maintenances by yourself.
- Clean the boat after every use.
- Flush the outboard motor after every use.
- Check the propeller regularly.
- Change the gear oil every season.
- Don’t leave any gas in the tank for a long time.
- Check all the bolts and connections regularly.
- Check the spark plugs.
- Check the battery.
- Check the bilge pump.
- Check the boat hull after taking out off the water.
- Check the boat anodes regularly.
These are some of the basic things you need to do for maintaining the boat properly. You need to check or clean some of them regularly, and others are seasonal. Now we will see how often we need to do all those simple maintenance checks for a boat.
- Boat cleaning – Do it regularly after boating.
- Flushing the outboard motor with water – After every use.
- Propeller checking – After every use.
- Changing gear oil – Every season or for 100 hours.
- Bolts and connections – Check regularly.
- Spark plugs – Every season or 3 to 4 months.
- Battery check – Every season(and charge it every month).
- Bilge pump checking – Check it before starting the ride(for safety purpose check it every time before starting the ride) and clean the bilge area regularly.
- Bottom Hull – Check every time after taking the boat out from the water.
- Boat anodes – If those anodes corrode 50% or more, then you need to replace them.
Boat maintenance is essential, and also trailer maintenance is necessary (if you have one). Check my article on Boat trailer maintenance for storage (opens in a new tab) for DIY tips.
1. Clean the boat after every use
Cleaning the boat is an essential thing, and every boater needs to do it regularly. Now, we will see what will happen if you didn’t clean the boat regularly.
Cleaning the boat after using it is essential, especially if you are boating in any saltwater. If you didn’t clean the boat regularly, some dirt might get stuck in the boat and may cause any stains or corrosion. Use any cleaner and clean the boat with a brush or microfiber cloth after every use.
If you are boating in freshwater, then no need to clean the boat after every use. Clean the boat after using it two or three times. Corrosion will occur quickly in saltwater than in freshwater. But, it is a good practice to clean the boat after every use.
If you are house is near the shore, then you might need to clean the boat two or three or even four times in a week regardless of the use (whether you are using the boat or not). Air will carry all the salt or dirt particles near the shore, and all that dirt particles may stick on your boat, which may cause any problems like stains or corrosions.
Overall, clean the boat after every use if you are boating in saltwater. Otherwise, clean the boat after using it two or three times if you are boating in freshwater. Clean the boat twice or thrice or even four times a week regardless of the use if your house is near the shore.
Check my article on How long you can leave the boat in the water (opens in a new tab) to know how long can you leave the boat in the saltwater and normal waters and growth prevention tips as well.
Some cleaning tips for a boat
- Use a microfiber cloth for cleaning the boat. It is a soft cloth and you can clean the things well with this cloth, and it will not leave any lint or dust on the surface of the boat.
- Use any cleaning liquid. Don’t clean the boat only with water, use any cleaning liquid. If you have any tough stains on the boat, it will remove the stains easily.
- Use a soft brush for general cleaning and a stiff bristle brush for tough stains. Don’t rub too hard with a stiff bristle brush it can peel off the paint.
- A 50/50 mix of vinegar is a good mixture to remove any water spots in the boat. Use it to remove water spots on the windshield, and anywhere else in the boat.
- Some dirt might form inside the boxes or near the hinges. So, open all the boxes and clean near the hinges properly.
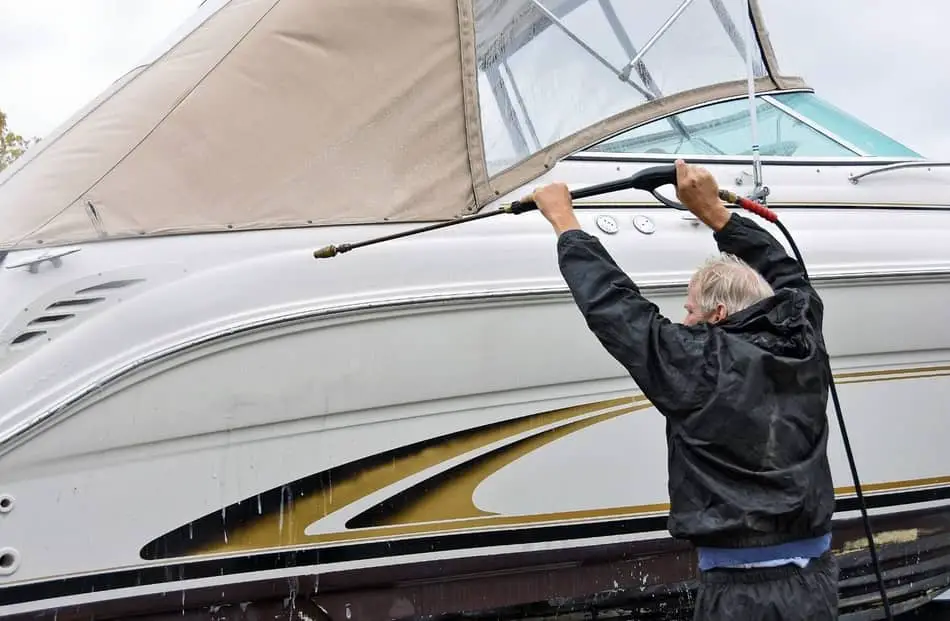
- Use the pressure washer (if you have one) and put some cleaner in the soap/cleaner injector place and spray it on the boat. Then wait for some time and then clean with normal water.
Check this video on cleaning the boat. He explained about cleaning inside the boxes and inside the boat as well.
2. Flush the outboard motor after every use
Flushing the outboard motor with fresh water is an essential thing you need to do after using the boat. Now, we will see why do we need to flush the water inside the outboard motor every time after boating.
While you are boating, the water will go from the bottom part of the motor and come out from telltale(for cooling the motor). When water goes inside, it will take all the dirt or any small particles, which might get stuck inside the motor. To clean that, we will flush the outboard motor with water.
It is a good practice to flush the outboard motor every time after using the boat. Regardless of where you will boat (maybe freshwater or saltwater), flush the outboard motor with fresh water after every use.
Flushing the outboard motor with water
- Generally, there will be holes at the bottom of the outboard motor, just above the propeller (and these holes may vary from the motor to motor). You need to keep the air muffs over there and connect it to the water pipe and start pumping the water.
- The water will go inside the motor, and it will clean the inner walls with fresh water. After starting the process, leave it for 10 min. So, it will clean the inner walls properly. While pumping the water, don’t forget to start the outboard motor.
- It is essential to flush the outboard motor, with freshwater, after every use. If you are using the boat in saltwater, then flush the outboard motor after every use. If you are using your boat in the freshwater, then flush the outboard motor after using your boat for one or two times.
3. Check the propeller regularly

Propeller checking is essential for every boater. You need to check the propeller condition every time after boating. Now, we will see why do we need to check the propeller condition every time after using the boat.
Every boater needs to check the propeller after coming back from boating because if there are any fishing lines stuck in the shaft or any bends in the propeller blades, it drastically decreases the speed and performance. So, for your next ride, you will get poor performance if there are any bends.
The type of propeller and maintenance condition will determine the overall performance of the outboard motor. If you have a good quality propeller and it is in good condition, then the overall performance will be good, you will get good speed, and motor health will be good for a long time, which means long life.
Even if there are any small bends, it will affect the speed and performance a lot. If the propeller has straight or sharp blades (without any bends), the water will go over the propeller blades smoothly. Otherwise, it will cause some disturbances, then your speed will decrease, causing many problems.
If there are any big scratches or any bends, then you might need to change the propeller. Checking the propeller is essential, and you need to do this whenever you remove the boat from the water.
Some tips for checking the boat propeller
- First, check for bends in the propeller. You can fix the propeller bends if the bends are very small. Use a file tool to repair the small bends (use both rough and finishing file). If the damage is not small, then don’t do it yourself.
- Next, check for any fishing lines wrapped in the shaft or not. Remove the propeller and remove the thrust washer, and check for any fishing lines wrapped around the shaft or not. If there are any fishing lines wrapped around the shaft, remove them.
- After that, apply some grease to the shaft and keep the propeller back. Then, don’t forget to keep the cotter pin back after finishing the work.
Checking for bends and fishing lines are the only things you need to do for propeller checking.
Whatever propeller you are having on the motor, you need to check the propeller regularly after completing the boating trip. If the propeller is damaged, then you need to buy a new propeller.
Aluminum propeller will be a good choice for money and durability than stainless steel. But, stainless steel will last longer and gives more speed (due to its design) than aluminum. However, if you maintain the aluminum propeller properly, and then you will get 2 or 3 years of life.
Check this video on repairing the propeller blades with a file tool.
4. Change the gear oil every season
Changing the lower unit gear oil is essential for an outboard motor. Now, we will see why do we need to change the lower unit gear oil for an outboard motor.
You need to change the lower unit gear oil every season because if there is any water present in the gear oil, and you leave it for a long time, then it may cause some problems, and you may not get good performance. Replacing the lower unit of an outboard motor is a bit expensive.
Changing the lower unit gear oil for an outboard motor
- There will be two screws fixed vertically in the lower unit of an outboard motor. It will vary from motor to motor for some other type motors there will be only one screw to change the gear oil. Remove those screws to change the gear oil.
- First, open the bottom screw, and then open the top screw. If you open the top screw, then only all the gear oil will come out. The upper screw will hold most of the gear oil. If you open the top screw first, the oil spills out. So, open the bottom screw first.
- If the oil coming out from those holes is thick and dark, then there is no water present in the oil. If there is any change in the color of the oil and it is milky, then the oil is mixed with water.
- When the whole oil comes out, then pump the new oil from the bottom hole until you see the oil coming out from the top hole. First, close the top hole, and then close the bottom one with the screw.
Don’t hesitate to change the gear oil every season. Some people will not change the gear oil if there is no water content in the oil. Change the gear oil for every season, to get good performance, and to avoid any damage.
Changing the gear while winterizing the boat is essential. If there is any water present in the gear oil, then it will freeze during winter, then you need to replace it.
5. Don’t leave any gas in the tank for a long time
Leaving the gas in the gas tank of an outboard motor or the boat for a long will cause many problems. Now, we will see what will happen if you leave the gas in the gas tank of an outboard motor or the boat for a long time.
If you leave the gas in the gas tank of an outboard motor or the boat for a long time, the gas inside the tank will evaporate, forming water at the bottom of the tank. It may damage the fuel system by corroding. So, don’t leave any gas for a long time in the boat.
The gas contains ethanol which pulls humidity out of the air by the end you will get water in the gas tank. So, don’t store any gas in the tank for a long time. Otherwise, use a stabilizer to prevent that oxidation process.
If the gas tank is completely sealed and you filled the tank with the gas, then it is fine to some extent. The less air inside the gas tank, the less oxidation it is going to take place. So, fill the tank as much as you want, if you are thinking to keep the gas inside the fuel for a long time.
The best option to prevent all this is to use a stabilizer. It is very crucial because if you didn’t stabilize the gas tank, then water will form in the tank, and sometimes the shape of the tank may change causing problems. So, stabilize the gas with a stabilizer if you are leaving it for a long time.
Stabilizing the gas tank in a boat
- There are so many brands out there. Choose the perfect one for stabilizing. Pour the stabilizer liquid into the tank, don’t pour the stabilizer how much you want. For every stabilizer you buy, they will give some instructions to use.
- Based on the instructions on the bottle, use it accordingly. If you use more, then the whole fuel will gum up, if you use less, it won’t stabilize the gas much. So, use it accordingly. They will tell to use 1oz for 10 liters or something like that, generally (quantity changes from brand to brand).
- After pouring the stabilizer into the tank, switch on the motor and leave it for some time (like 5 – 10 min). The stabilizer will flow inside all the fuel lines, carburetors, and cylinders, stabilizing the gas.
It’s good to use the stabilizer if you are not using your boat for 2 or 3 weeks. So, you won’t get any problems in the future. If you are storing the gas for a long time, then don’t forget to use a stabilizer.
The better option would be, don’t leave any fuel in the tank. Use the gas how much you want for the day.
6. Check all the bolts and cable connections regularly
Checking the bolts and connections in the boat regularly is another essential thing. Now, we will see why do we need to check the bolts and connections regularly in a boat.
Keep an eye on all the bolts in the boat. The bolts will corrode easily if you leave it for a long time without taking any care. Whenever you remove the bolts, then apply grease or any other lubricant while keeping them back. So, it will last long enough.
- Then check all the cable connections in the outboard, whether they become loose or not, then tighten them.
- See for any cracks in the fuel lines. If there are any cracks in the fuel line, then fix them or replace them.
- Check all the rubber cables. If the rubber cables are sticky, then try to change them.
If there is any water stuck in the wirings, it may corrode and cause some problems. To prevent the corrosion in the wirings, use silicon spray (or any other spray). Silicone spray is water-resistant, and it will protect items from corrosion.
Just spray the silicone spray on the wiring and wherever you want. Spray it all over the outboard motor.
7. Check the spark plugs
Checking the spark plugs of an outboard motor is essential. You need to check them regularly. Now, we will see why do we need to check the spark plugs regularly in a boat.
Spark plugs will tell overall health inside the cylinders of an outboard motor. Open the spark plugs and check them regularly. If the center electrode of the spark plugs is black then change them. Generally, the white color center electrode indicates that the spark plug is in good condition.
No need to check them regularly check them every season or for 3 months. Don’t use an electric impact wrench for keeping the spark plugs back. Using an electric impact wrench might cause any issues while tightening the spark plugs. You can use it while you are removing the spark plugs.
8. Check the battery
Checking the battery regularly for the boat is essential. You need to check them regularly. Now, we will see why do we need to check the battery regularly in a boat.
Just turning off the boat will not prevent the battery from draining. You might not be aware of it, but while your boat is turned off, your battery could still draw power from things such as the radio, bilge pump, or clock, etc. So, remove the battery if you are not using the boat for a long time.
So, be careful if you are leaving the boat for a long time. If you already knew that you will leave the boat for a long time, then remove the battery from the boat and keep it inside the home.
Before removing the battery from the boat, make sure that it is fully charged. Then, store the battery inside your home, and charge it every two or three weeks, to avoid any problems in the future.
Maintenance check for a boat battery
- First, clean the battery with any cleaner and get rid of any dust stuck on the battery. Then check the case properly, and make sure it doesn’t have any bulge or any other cracks on the battery. If there are any bulges or cracks on the battery means, you are overcharging the battery.
- Next, check the terminal posts. If the terminals are corroded, then clean it up with a terminal post cleaner or any small stiff bristle brush. Next, check the battery posts, and clean them if they are corroded, use any cleaner or soda and clean them.
- Every month check them and tighten them up. So, by doing that, you can prevent low voltage in the battery. If they are loose, then you will get low voltage.
- There are two types of batteries. One is a maintenance-free battery, and another is a lead-acid battery. For both types, you need to check the distilled water level, and you need to fill it if the water level is low. Use only distilled water, not any other water or tap water.
- If you are using a lead-acid battery, then it is easy to refill the distilled water than a maintenance-free battery.
- Then check the voltage of the batteries.
- Then finally coat the terminal posts with grease. These are the basic steps to do every once in a season for better performance.
Different voltage levels of all types of marine batteries are listed below in the table.
| Charge level | Sealed or Lead Acid battery (in volts) | Gel battery (in volts) | AGM battery (in volts) |
| 100% | 12.70+ | 12.85+ | 12.80+ |
| 75% | 12.40 | 12.65 | 12.60 |
| 50% | 12.20 | 12.35 | 12.30 |
| 25% | 12.00 | 12.00 | 12.00 |
| 0% | 11.80 | 11.80 | 11.80 |
Always keep a micro-jump starter in the boat. If the boat battery is in low voltage, then you can use these micro-jump starters to turn it into a high voltage condition. You can get these micro-jump starters for 50 to 100 dollars.
Check this Boatus article on marine battery maintenance click here (don’t worry, it will open in new tab).
9. Check the bilge pump
Checking the bilge pump regularly for a boat is essential. You need to check them regularly. Now, we will see why do we need to check the bilge pump of a boat regularly.
A bilge pump is a pump that is used to pump all the water from the boat. Having this on the boat will always save a lot of time. Ensure whether your bilge pump is working properly or not, because they often fail. The boat can sink in the water if the bilge pump is not working properly.
So, before starting the trip, just check whether the bilge pump is working or not by lifting it. Clean the bilge area in the boat regularly because all the dirty water in the boat will go there.
So clean the bilge pump regularly and clean the bilge area to avoid any problems. If the bilge pump is not working, then change the bilge pump.
- Sometimes, the bilge pump might stop working due to any disturbances caused inside the boat. If you are using a manual bilge pump, then it is fine because every time you will check the water level, and you will turn on the pump switch.
- If you using an automatic one, which will detect the water level and automatically turn on the bilge pump switch, to pump the water out. The problem with this automatic water detection is it fails so many times. It may fail due to many reasons.
- So, check whether the bilge pump is working or not before starting the trip. Checking the bilge pump is a minute work.
Check my article on Do I need a bilge pump on my boat? (opens in a new tab) to know the importance of a bilge pump for a boat.
10. Check the boat hull after taking off from the water
Boat hull maintenance is another essential thing you need to check after taking the boat out from the water. Now, we will see why do we need to maintain or check the hull after taking the boat out from the water.
Hull (underside) maintenance for a boat is essential, especially if you are boating in any saltwater. If you didn’t clean the boat hull regularly, some dirt might get stuck or algae might form and may cause any problems in the future. So, clean the boat hull regularly with the cleaner.
Waxing, polishing, and painting a boat might not be a DIY for the first time. It might be a bit hard if you are doing it for the first time. If you do it regularly for once in every 6 months or a year, then you can DIY.
Check my article on Why do boats need bottom paint? (opens in a new tab) to know what all boats need bottom paint.
Fiberglass boat hull maintenance
- For a fiberglass hull, you need to wax or polish the hull every year for better maintenance (you can do it every 6 months for a good life).
- First, wash the boat to remove any buildup of dirt, grime, mineral deposits, or algae. Then, apply a cleaner to treat oxidation and prepare the hull for polish.
- If you have any barnacles or algae on the hull, then use some muriatic or hydrochloric acid.
- If you are boating in saltwater, then use good paint on it so it protects the bottom hull.
Aluminum boat hull maintenance
- For an aluminum boat, you need to wax or polish the hull every year for better maintenance(you can do it every 6 months for a good life).
- First, wash the boat to remove any buildup of dirt, grime, mineral deposits, or algae. Then, apply an aluminum cleaner to treat oxidation and prepare the hull for polish.
- Finally, apply an aluminum polish and buff it in to seal the aluminum and make your boat shine.
- If you have any barnacles or algae on the hull, don’t use muriatic acid on an aluminum boat, it will form stains if you use acid on an aluminum boat.
- Use a water-resistant paint color of your choice and apply the first coat. Paint half of the boat, allow it to dry completely and then turn the boat over to complete the other side. To get the best color, you might find that two coats will work best.
The next part is cleaning the hull. You can do this while you are cleaning the boat after coming from boating. As I said on the top (cleaning the boat), you can follow the same steps for cleaning the hull as well.
If you are boating in freshwater, then no need to clean the boat after every use. Clean the boat after using it two or three times. Corrosion will occur quickly in saltwater than in freshwater. But, it is a good practice to clean the boat after every use.
Overall, clean the boat after every use if you are boating in saltwater. Otherwise, clean the boat after using it two or three times if you are boating in freshwater. Clean the boat twice or thrice or even four times a week regardless of the use if your house is near the shore.
Some cleaning tips for a boat hull
- Use a microfiber cloth for cleaning the boat. It is a very soft cloth and you can clean the things well with this cloth. And it will not leave any lint or dust on the surface of the boat.
- Use any cleaning liquid. Don’t clean the boat only with water, use any cleaning liquid. If you have any tough stains on the boat, it will remove the stains easily.
- Use a soft brush for general cleaning and a stiff bristle brush for tough stains. Don’t rub too hard with a stiff bristle brush it can peel off the paint.
- A 50/50 mix of vinegar is a good mixture to remove any water spots in the boat.
- Use the pressure washer(if you have any) and put some cleaner in the soap/cleaner injector place and spray it on the boat. Then wait for some time and then clean with normal water.
11. Check the boat anodes regularly
Boat anodes are another essential thing, and you need to check them regularly. Now, we will see why do we need the boat anodes regularly.
Anodes are used in the boates to prevent galvanic corrosion of any metals. These are known as sacrificial anodes. These are screwed up to the shaft, propeller, hull, trim tabs, etc, to prevent them from corrosion. These anodes corrode themselves to protect the shaft, propeller, hull, trim tabs, etc.
There are three types of anodes for a boat
- Zinc anode for a boat can be used for saltwater.
- The aluminum anode for a boat can be used in saltwater, freshwater, and brackish water.
- Magnesium anode for a boat can be used for freshwater.
An aluminum anode is best for all types of water.
These are sacrificial anodes and they corrode often. So, you need to check them regularly. If those anodes corrode 50% or more, then you need to replace them.
Key takeaways
The key takeaways for this article are how often do we need to do the boat maintenance checks. Those are regular check are listed below.
- Boat cleaning – Do it regularly after boating.
- Flushing the outboard motor with water – After every use.
- Propeller checking – After every use.
- Changing gear oil – Every season or for 100 hours.
- Bolts and connections – Check regularly.
- Spark plugs – Every season or 3 to 4 months.
- Battery check – Every season(and charge it every month).
- Bilge pump checking – Check it before starting the ride(for safety purpose check it every time before starting the ride) and clean the bilge area regularly.
- Bottom Hull – Check every time after taking the boat out from the water.
- Boat anodes – If those anodes corrode 50% or more, then you need to replace them.